Friday, 1 April 2022

COTGB Scenarios: Rearguard Action

Another distant signal have been received from Mark Stevens in Pattaya, and has been reposted here for posterity....

This scenario represents the aftermath of a battle, which the Defenders have lost. Their rearguard is trying to delay the pursuit for as long as possible so the leadership can escape. The two sides are :

The Forces

Desert Raiders, 16 slots (living count 7):
🟌2 x Proud Warrior squads (4) 
🟌1 x Trapper squad (2) 
🟌1 x Starport Thugs squad (Mercenaries) (3)
🟌1 x Marksmen character (armed with jezzail) (2)
🟌1 x Maverick character (Stilgar)* (3)
🟌1 x Muscle sidekick character (bodyguard) (2)

Trading Conglomerate, 16 slots (living count 7):
🟌 4 x Cadet squads (warbots) (8)
🟌 1 x Primordial beast character (Col. Kranki)* (4)
🟌 1 x Burden character (Kranki's special friend) (1)
🟌 1 x Sentry gun character (3)

* Leaders

🌟🌟🌟🌟🌟🌟🌟🌟🌟🌟🌟🌟🌟🌟🌟🌟🌟🌟🌟🌟🌟🌟🌟🌟🌟🌟🌟🌟🌟🌟

After forces are chosen, terrain placed, and opposite sides selected, the sides dice roll to see who will be attacker & defender. The Desert Raiders will be the defenders. They choose one card from their bid deck (at random) and must remove slots from their line up equivalent to the card bid value. In a two player game this need not be immediately revealed to the Attacker, but in a solo game it’s easier to assume spies or traitors have conveyed the information to Attacker HQ before the game starts.

The card the Desert Raiders drew was a 5. The slots removed are 1 Starport Thugs squad and 1 Muscle sidekick character. The Living count accordingly is reduced to 5.

The Attackers (Colonel Kranki & the Trading Conglomerate) will be the NPC).

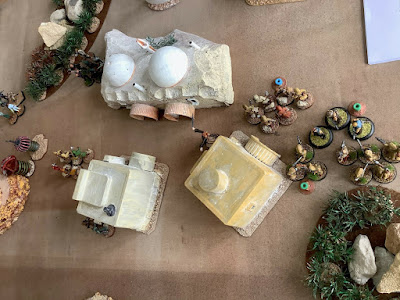
Here’s the tabletop with starting positions, which are handled per a normal CotGB game. The Desert Raiders have their Proud Warrior squads in the centre-left forest & behind the largest hill. The Trappers have been given the ambush capability so are not deployed yet. The Marksman is behind the hill at upper left. The leader (Stilgar) is with the Proud Warriors at centre left.


Kranki, the Burden, & 2 Cadet squads are in the centre between the hills, with the other Cadets at centre top. The sentry gun is on top of the biggest hill.

The hills, and swamp are assumed to be covered with rocks, ditches, etc that provide cover.

🌟🌟🌟🌟🌟🌟🌟🌟🌟🌟🌟🌟🌟🌟🌟🌟🌟🌟🌟🌟🌟🌟🌟🌟🌟🌟🌟🌟🌟🌟

Turn 1: Trading Conglomerate bid 1; Desert Raiders bid 2
Kranki advanced 1 Cadet squad from the pair on his left, onto the small hill, towards the enemy Marksman. Stilgar responded by inserting his Trapper squad (revealing the ambush) onto the hill, between the Cadets and the Marksman.

Turn 2: Trading Conglomerate bid 6; Desert Raiders bid 4
Stilgar took shots at one of the Cadet units with the Marksman and the Proud Warrior squad in the big forest. He passed on the rest of his activation points. Both units missed but in return fire the Cadets hit one of the Proud Warriors. Kranki used his non-initiative points to move 2 cadet squads towards the Proud Warriors in the big forest.

Turn 3: Trading Conglomerate bid 6; Desert Raiders bid 6
A drawn bid. Both sides get two action points usable for shooting only. Trading Conglomerate goes first. Kranki shot at the Proud Warriors in the forest with both Cadet units that had closed in on them. They scored only a combined 1 hit though. The Proud Warriors, responding with Return Fire, scored 2 hits, 1 on each Cadet squad. Then it was the Proud Warriors turn to shoot, using the depleted squad in the first + the other squad on the edge of the big hill. One hit. So at the end of this firefight Turn the Proud Warriors squad has lost 2 figures, 1 Cadet squad has also lost 2, the other has lost 1. 

Here’s the end of Turn 3 position. On the big hill on the left a Proud Warriors squad is facing off the sentry gun. Behind the hill, a Cadet squad & Kranki wait. In the centre, the firefight between the Proud Warriors in the forest & 2 Cadet squads moving in has left 2 Proud Warriors & 3 Cadets down. On the right, more Cadets face a Trapper squad, plus the Marksman.


Turn 4: Trading Conglomerate bid 5; Desert Raiders bid 3
The Proud Warriors use their Initiative points to do aimed shooting. The Marksman & both Warrior squads will shoot at the Cadet squads facing the Warriors in the centre forest.

The Cadets opt to stand their ground and return fire. In a highly successful firefight for the Desert Raiders, they took no losses but downed 4 Cadet figures, taking the two squads to Green and Yellow condition, respectively. Kranki used his non-initiative points to move the Cadets facing the Trappers off the hill, and his last Cadet reserves forward.

Here we are again, end of Turn 4 


Turn 5: Trading Conglomerate bid 5; Desert Raiders bid 2
Stilgar calls in the Trappers from the hill, and the Warriors from the big hill. I wasn’t sure if the Sentry Gun would be able shoot at the Warriors as they moved, the hill crest might be in the way, A dice roll indicated that, indeed, the gun could not get a firing solution. Kranki used his non-initiative points to move the sentry gun forward, and move himself and his Burden associate up to the Cadets.

Turn 6: Trading Conglomerate bid 4; Desert Raiders bid 6
Kranki orders a charge on the Proud Warriors in the big forest, by his Condition Green & Yellow squads. The Proud Warriors use opportunity fire against the incoming Yellow unit as it charges, taking it to condition Red. Kranki also moves other units into better positions. Stilgar uses his remaining non-initiative point to move his Trappers into the big forest.

In the combat, the Proud Warriors fight the condition Green Cadets first, killing two of them for no loss, taking those Cadets to condition Red. They then battled the other Cadets who were already on Red. The Proud Warriors killed the last warbot standing, eliminating this squad.

Here’s the end of turn position. So far, Kranki’s attempt to bash his way through the defence has been a failure, as he uses Cadets (shooting experts) to try and dislodge Proud Warriors (fairly good at both shooting & close combat) from defensive positions. Does he have the intestinal fortitude to keep up the pressure. Or if not, what alternative tactic will he switch to ?


Turn 7: Trading Conglomerate bid 2; Desert Raiders bid 4
Finally, Kranki looks away from the big melee, and sees other opportunities! He uses his initiative points for the Sentry gun to shoot at the Proud Warrior squad nearest it, and to insert another Cadet unit into the melee. The Warriors return fire as the Sentry gun shoots them up , causing it to suffer 1 hit (condition Green) but the Warriors in turn are almost wiped out (condition Red). Maybe they should have tried to dodge.

Stilgar uses his non-initiative points to move the Trappers into line behind the Warriors, as a new defence line in the forest, and for the Marksman to take an opportunity shot at the fresh Cadet squad as it charges into the melee, taking down 1 warbot.

The ongoing melee starts with the Warriors fighting the fresh Cadet unit. No losses on either side. Against the other (condition Red) Cadets, desperation led them to cause another Warrior casualty before being wiped out.

End of Turn update. The close combat in the big forest continues, with the Proud Warriors now at half strength (3 figures) and a fresh cadet unit  piling in with 5 figures in hand. Stilgar the Desert Raider leader is just to the rear, and the Trapper squad is lined up behind him. To the right, the Desert Raider Marksman awaits a fresh target. To the left, the Sentry gun has taken the other Proud Warrior squad to condition Red with a single burst of fire, but itself is now on condition Green.


Kranki & Burden, and the last intact Cadet squad, wait to the rear of the action.

The Trading Conglomerate have failed to break through by the end of Turn 7, so cannot win a Major Victory, though a Minor Victory is still very possible.

Casualties so far: Trading Conglomerate have lost 13 Cadets (2 dead, 5 living). Desert Raiders have lost 8 Proud Warriors (1 dead, 4 living).

Turn 8: Trading Conglomerate bid 2; Desert Raiders bid 1
Stilgar orders his Marksman to shoot at Kranki, who is the closest enemy not in melee and in LOS. Kranki dodges. Bugger. Kranki uses his non-initiative point to move his last intact Cadets up to where they can shoot at, or charge, the Marksman next turn. About time.

The melee in the forest continues. The Warriors take another loss and go to condition Yellow. The Cadets take two losses and go to Green.

Turn 9: Trading Conglomerate bid 1; Desert Raiders bid 1
Another drawn bid, due to a sudden violent electrical storm. The reroll give Trading Conglomerate 6; Desert Raiders 5.

Stilgar himself falls back behind the Trappers, and his Marksman ducks into the cover of the adjacent hill, attracting opportunity fire from the nearby intact Cadet unit. The Marksman fails to dodge and is shredded in a lethal Cadet fusillade. This is a serious blow, it might lose the game 😧 for the Desert Raiders.

In the melee, the Cadets pull off another win. Rolling lower, their melee dice wipe out the last 2 Proud Warriors before they can respond, and so they lose nothing themselves. With this the Desert Raiders have 3 dead and 2 living, so lose the game. Here is the final position.


To the left, the stand off between the sentry gun and the condition red Proud Warriors continues. To the right the intact Cadet squad celebrates the destruction of the Desert Raider Marksman (out of shot to the right). In the centre, Kranki and his special friend celebrate as the Cadet unit on condition Green dispose of the  last Proud Warriors after their epic defence. Deeper in the forest the Trappers, and Stilgar, are intact but must now try to escape the wrath of the victors.

🌟🌟🌟🌟🌟🌟🌟🌟🌟🌟🌟🌟🌟🌟🌟🌟🌟🌟🌟🌟🌟🌟🌟🌟🌟🌟🌟🌟🌟🌟

Losses: Desert Raiders: 11 Warriors, 1 Marksman = 3 dead, 2 living. Trading Conglomerate: 15 warbots = 3 dead, 4 living. This counts as a Minor Victory for the Trading Conglomerate. Had the game continued into Turn 10, the Desert Raiders would have won a Major Victory, regardless of the usual win/loss rules, for holding off the Trading Conglomerate long enough.

A damned near-run thing. It was won on the playing fields of the Bakhtiar Warbot Foundry.

That’s all from CotGB land, and Pattaya, for now.

Monday, 28 March 2022

COTGB Scenarios: Research Station X

Some distant signals have been received from Mark Stevens in Pattaya, and have been reposted here for posterity....

CotGB is “Challengers of the Great Beyond” a sci-fi skirmish ruleset by Victor Jarmusz (publisher Ganesha Games), using the “Battlesworn” engine. The most unusual aspects of which are (1) no measuring move or shooting distances; (2) activation is by competitive bids. Sounds weird. Works well. There is a solo play mechanism which retains the bidding element. Here’s shot of the rule book cover ➤

As the cover art suggests is very much at the space opera / science fantasy end of the spectrum. Think Flash Gordon rather than Starship Troopers. My own figures are mostly WOTC Star Wars plastics.

Anyway, here is the “Research Station X” scenario provided in the rules. If time permits I’ll do the “Rearguard Action” scenario too, in a follow up report.

🌟🌟🌟🌟🌟🌟🌟🌟🌟🌟🌟🌟🌟🌟🌟🌟🌟🌟🌟🌟🌟🌟🌟🌟🌟🌟🌟🌟🌟🌟

The Forces

The two opposing forces for this game will be a Crime Gang and a Smuggler crew, both based on the list of possible sample forces but, per the scenario special conditions, reduced to 9 slots only.

Wat Tambor & his Crime Gang (living count 3)
🟌2 x Starport thug squads (total 6 slots)
🟌1 x Crime Lord character (total 3 slots) (leader)

Worm Loathsom & the Smugglers (living count 3)
🟌1 x Starport thug squad (total 3 slots)
🟌1 x Robber Crew squad (total 3 slots)
🟌1 x Smuggler character (total 3 slots) (leader)

In a nutshell, this is a fight to control (or deny enemy control) of a squad of passive “scientists” in a research station in the centre of the table.

I will be actively playing the Smuggler faction, and the Crime Gang will use the NPC bidding. The Crime Gang are attackers.

🌟🌟🌟🌟🌟🌟🌟🌟🌟🌟🌟🌟🌟🌟🌟🌟🌟🌟🌟🌟🌟🌟🌟🌟🌟🌟🌟🌟🌟🌟

Turn 1: Crime gang bid 3, Smugglers bid 2

So the Smugglers get to make 2 initiative points, and the Gang get 1 non-initiative point. Loathsom (despite his name he is a popular and successful Smuggler) decides to move himself and his Starport Thugs squad up to the edge of the research station. On the other side, Tambor moves up one of his squads too. Here is the end of Turn position The Crime Gang came in from the left, the Smugglers from the right.


Turn 2: Crime gang bid 3; Smugglers bid 3
The “drawn bids” table indicates the Smugglers (as nominal defenders) get to set a trap under a selected enemy unit. Loathsom targets Crime Lord Wat Tambor himself. He is hit by a trap, and goes to “prone” condition

Turn 3: Crime gang bids 6; Smugglers bid 3
Loathsom and his Starport Thugs enter the research station and look for the scientists (under the  scenario rules the latter are not in LOS at this point, presumably they’re inside the building). His Robber Crew also move, using their Rocket packs to fly right across the table to a position near the enemy who are still on their own baseline.

In response, the Gang use their non-initiative points to recover Wat Tambor from the effects of the trap, throw a protective cordon between Tambor and the Robber Crew, and enter the research station to search for the scientists.

Here’s the end of turn situation. In the research station, the two gangs of Starport Thugs face off. Elsewhere, Tambor is screened by his other Starport Thugs from the Robber Crew who have dropped in to say hello.


Turn 4: Crime gang bid 1; Smugglers bid 1
Another drawn bid. The alternative initiative resolution prescribed in the drawn bid table translated this to Crime Gang 5; Smugglers 3, plus no flying is allowed because of a violent electrical storm.

Admin note: For the sake of making it harder to capture scientists, I decided that any unit/s in the research station must use 1 miscellaneous action to capture 1 scientist, until they are all caught. 

The Smugglers use their initiative points for the Robber Crew to shoot at the Starport Thugs closest to them, but  missed as the Thugs somehow dodged 😞. Elsewhere Loathsom ordered his Thugs in the research station to keep looking. He and they used 2  miscellaneous actions to capture 2 scientists. 

The Gang used all their non-initiative action to catch 2 scientists of their own. We now have this weird situation with the two squads of Starport Thugs occupying the same terrain space, but unable to charge (they will not charge an enemy unless it is condition Yellow or Red) or shoot (I ruled LOS was not good enough inside the BUA being the effect of abstracting rooms, walls etc).

End of Turn situation. You can see the boffins (on grey sand bases) alongside the squads (& Loathsom) that have caught them. Two more eggheads remain uncaptured as yet. Hiding under their lab benches no doubt.


Turn 5: Crime gang bids 6; Smugglers bid 6
Another drawn bid, that’s 3 out of 6 bids drawn. Both sides get 2 action points for shooting only, resolving shooting from the nominal attacker (Crime Gang) first. Also 2 melee phases. Well, there are no melees under way, but there is an available firefight, which we can stretch to 2 exchanges of fire. 

The Crime Gang’s Starport Thugs had shot at the Smugglers’ Robber Crew twice, and received two rounds of return fire, the Robber Crew had been wiped out and the Starport Thugs were in condition Red (reduced to 1 figure only). Here is the scene of carnage:-


Turn 6: Crime gang bids 5; Smugglers bid 2
Worm Loathsom and his Starport Thugs inside the research station use both their initiative points as miscellaneous actions and round up the two remaining scientists. Now they have 4 from 6 and the Crime Gang have only 2 from 6. The Gang use non-contact moves to move their condition Red unit & Wat Tambor up to the outside edge of the research station.

Turn 7: Crime gang bids 5: Smugglers bid 4
Loathsom orders his Starport Thugs to pull back from the research station, and he himself does likewise. The scenario allows the captured scientists to move with the capturing unit. The retreating units stop just outside the station (change of terrain). In the non-initiative phase, Wat Tambor moves into the research station to join his own Thug squad. Here’s the state of play as the end-game gets under way;


Turn 8: Crime gang bids 4; Smugglers bid 4
Another drawn bid, now 4 from 8! Regroup. The defender (Smugglers) get 2 non-initiative points. The attacker gets nothing. The Smugglers (Worm and the Starport Thugs) retreat to the large thorn bush patch and take up defensive positions just inside.

Turn 9: Crime gang bids 1; Smugglers bid 5
The Crime Gang advance through the research station and take up positions just opposite the Smugglers. Tambor and the other (condition Red) unit cannot join them, no actions available.

Turn 10: Crime gang bids 4; Smugglers bid 1
The standoff between the two squads of Starport Thugs continues. They cannot charge as the enemy is not on condition Yellow or Red. But they now can shoot. The shooting bids are Smugglers 1, Crime gang 2. The Gang opt to return fire rather than try to dodge. The Smugglers cause 1 loss to Tambor’s men, who turns out to be one of the captured scientists. The Crime gang shoot back from the research station, with no result.


🌟🌟🌟🌟🌟🌟🌟🌟🌟🌟🌟🌟🌟🌟🌟🌟🌟🌟🌟🌟🌟🌟🌟🌟🌟🌟🌟🌟🌟🌟

That’s the end of the game.

The Crime Gang end with a living count of 2 (after losing 5 thugs who also count as 1 dead). They gain +2 for occupying the research station unopposed and +1 for living captured scientists. Total = 5

The Smugglers started end with a living count of 2 (after losing the 4 Robber Crew). They have +4 for the captured scientists. Total = 6.

So, a narrow win for Worm Loathsom and his Smugglers.

Tuesday, 3 November 2020

CoTGB: The Anchorhead War (Second Battle)


Next report from Mark at Mos Pattaya of the ongoing campaign using the Challengers of the Great Beyond rules:

As news spread of the destruction of Anchorhead by the Sand People, refugees from many remote settlements fled to Mos Pattaya and the other larger towns to seek safety. Leaders of the Moisture Farmers’ League, using the slogan “the only good Tusken is a dead Tusken”, raised funds to hire a mercenary outfit to take the fight to the Sand People.
 
Early in the Month of the Crottled Greep, the mercenaries headed into the Dune Sea, into an area long known to contain Sand People camps and home territories, on a search and destroy mission.

Biffo at the Krayt Gorge

For this game the two sides were:

Mercenaries (6 life points)
1 x Crime boss (leader) (Lorm Woathsom) - character (3 slots)
1 x Medic (Dr McCoy) - character (2 slots)
1 x Sentry gun (Robot Walker) - character (3 slots)
2 x Starport thugs (Humanoid scum) - squads of 6 (6 slots)
1 x Cadets (Battle droids) - squad of 6 - (2 slots)
 All these figures are plastic Star Wars minis by Wizards of the Coast. No longer in production.


Sand People (7 life points)
1 x Champion (Liet Kynes) - character (3 slots)
1 x Maverick (leader) (Stilgar) - character (3 slots)
1 x Marksman - Tusken with jezzail rifle - character - (2 slots)
3 x Proud warriors (Sand People) - squads of 6 - (6 slots)
1 x Trappers (Jawa) - squad of 6 - (2 slots)
The Trappers are WOTC Jawa figures, the others are from the Ironclad Minis ‘Sanwar’ range. The additional squad accidently left out of the shot is from my Archives Cultists, they are very old Citadel Necromunda figures from the ‘Redemptorist’ gang. You’ll be able to spot them in some of the following pictures.


Here is the tabletop, showing the Krayt Gorge and initial deployments. The Trappers + a Proud Warriors squad are hiding in the wood. All terrain (buttes, thornbush & rock thickets) is impassable, except for the camp, three small dunes, and the green wood (which is growing around a soakhole, hence the Tusken camp).


The Sand People are coming from the West (L side) as the mercenary column approaches from the East (R side). The huts represent a Tusken camp. Each hut passively defends at S:M3 / M:M3 and counts as being in cover. If the Mercenaries can destroy them all they can remove any Proud Warriors squad on the table (they have run off to defend their families).

After 3 turns the Mercenaries are advancing cautiously towards the camp, trying to ensure any Sand People movement in the open will be punished by shooting.


The Sentry gun has moved off the dune at R to a position from where it can shoot at the warrior squad way across the table, and on turn 3 it fired, causing three hits. In a non-initiative response move a warrior squad (ex-Redemptorists) hidden in the wood has appeared on the flank of the gun ...

Turn 4 was a busy one, the Sand People won initiative 3-5. The Warrior squad that emerged from ambush charged the Sentry gun, which scored only one hit using opportunity fire against them (not aimed fire = no bonus dice). In the ensuing melee the Warriors took the gun to condition Red (they destroyed it next turn). This is at bottom of the photo.


Another Warrior squad, and the Champion, charged into the Cadets, who failed to score any hits as they came in. The melee ended with 3 Cadets & 2 Warriors down, and the Champion lost 1 life point (of 5) (Blue marker). The Cadets go to condition Green. This is in the centre of the photo. The Mercenaries responded by moving up a thug squad to where it can charge or shoot at the other Warrior squad (top of photo) next time.

At the end of turn 6 this was the position. At top of photo the Mercenary leader (Crime lord Lorm Woathsom) has scooted around the large butte to be out of LOS of the Sand People marksman, who is hunting him, just out of shot on the dune at R. The various explosions each mark the destruction of a unit.

At L, the Sand People have lost a warrior unit, though the leader (Stilgar) survives on condition Yellow and another Warrior squad is nearby on condition Green. This is the unit that previously destroyed the Sentry gun. The Mercenaries have 2 Scum squads in this area, 1 on condition Yellow and 1 undamaged. Both sides have been using the leadership bonus in the melee here.


Over on the R the Sand People have a Trapper squad untouched in the wood. They also have a Warrior squad on condition Green, and the Champion (Liet Kynes) who has lost 3/5 life points. But the Mercenaries have lost their entire Cadet squad, and their Medic. It should be noted that Dr McCoy did heal 1 lost cadet, and inflicted two hits on the Sand People attackers, before falling. There are lessons to be learned here about forward deployment of Medics ... they need to be close to the action but not too close. Probably safer to use them supporting units in shooting mode rather than getting close to mêlées,

Win/lose check.
🚩 Mercenaries: Living: 1 character + 8 squaddies = 2 lives. Dead: 2 characters + 10 squaddies = 4 lives.
🚩 Sand People: Living: 3 characters + 12 squaddies =5 lives. Dead: 12 squaddies = 2 lives.   

So the Sand People have won again, after a somewhat shaky start. The mercenaries did try a strategy of pushing for the Tusken camp using firepower to cover their open flank, but in the end it fell short. It looks as if only Lorm Woathsom and one squad of Starport scum (undamaged units) will be able to get away. The Sand People have only the Trappers undamaged, all other surviving units are on condition Green or Yellow.

Next - the Imperial garrison on Tataouine gets involved.

Cheers from Mos Pattaya
Mark


Tuesday, 27 October 2020

CoTGB: The Anchorhead War (First Battle)


Mark Stevens from Mos Pattaya has run a series of battles in a linked campaign, using Challengers of the Great Beyond. The figures used are mostly from the now defunct Wizards of the Coast Star Wars range, but there are a lot from other manufacturers mixed in. I'll now leave it to Marks battle report...

The so called Anchorhead War is not widely known beyond the arid Outer-Rim world of Tataouine. It got its name from what could be seen in retrospect as the first skirmish in the conflict, when indigenous primitives (Sand People) attacked the small moisture farming settlement of Anchorhead on the edge of the Dune Sea.

The two sides each comprised the statutory 16 slots:

Sand People: life points 7
1 x Maverick character - Stilgar (Leader) (3)
1 x Beast rider character (Sand People warrior on giant lizard) (3)
1 x Marksman character (Sand People warrior with jezzail sniper rifle) (2)
4 x Proud warrior squads (Sand People warriors, 6 pet squad) (8)

Anchorhead defenders: life points 7
1 x Psi-master character (Jedi master Kyle Katarn*) (Leader) (5)
1 x Sentry gun character (Community defence weapon) (3)
4 x Cadets squads (Assorted armed inhabitants, 6 per squad) (8)
* “Honestly guv, I was just passing through”

Here’s the (900x900mm) tabletop, featuring the little settlement and surrounding buttes and patches of thorn scrub & rocks, all impenetrable. The two forces are lined up facing each other off-table at R, attackers nearer the camera.

This is a "modified" ambush scenario. The Sand People will attack from the South (bottom of photo). The defenders will start with their character models (Jedi Master, Sentry gun) and one squad on table. The other squads are assumed to be coming from surrounding settlements and will arrive from the North on the first turn after turn 2 when the defender side does not win initiative.

After 2 turns the Sand People seem to be overrunning Anchorhead. At top R the explosion marker shows where one warrior squad has charged the sentry gun. It failed to score any hits on them as they charged, or in the melee and they destroyed it (4 melee hits).

Near the sentry gun you can see Jedi Master “Leaping” Kyle Katarn. He was attacked by the warrior squad now in the Main Street. At lower L yet another Sand People squad survived an opportunity fire shot from the moisture farmers (2 hits) and dominated them in the melee (3 hits).


After 6 turns the Moisture Farmers are staging a bit of a comeback, but probably it won’t be enough. At top of shot 1 Sand People squad is being shot at by 2 Moisture Farmer squads, but so far each side has suffered only a single loss. But Kyle Katarn is having more success: he has used his psi powers to Mind Control the Sand People squad with the blue marker, and now he is moving them towards the big melee at bottom of shot.


In the big melee the Sand People now have 2 squads involved, one of which is on Condition Green. The Moisture Farmers have lost 1 whole squad, and have another squad on Green, but the Mind Controlled Sand People may be about to pile in! 

Elsewhere, the Sand People beast rider is still back on the start line from lack of Initiative Points. Stilgar (the Sand People leader) and the Marksman can be seen behind one of the houses. They were plotting an attack on Kyle Katarn but he has moved away.

Losses (life points) are: Sand People 1; Moisture Farmers 3.

The game ended at the end of turn 11, with a clear win to the Sand People. The photo shows the final position. At top of shot are 2 Moisture Farmer squads, one on Condition Green. They have destroyed a Sand People squad and Beast rider. To the L of them, another Sand People squad and the leader Stilgar (Maverick) have taken the Jedi Master Kyle Katarn to Condition Red. He chose to continue mind-controlling the enemy squad rather than (say) push the attacking squad away. The mind controlled squad is at bottom R of shot.


Both sides began with a life count (used for determining winning / losing) of 7, based on “more dead than alive” A life point is equal to 5 squad members or 1 (sometimes 2) character models. Kyle Katarn is a 2-point character.

At the end of the game the Sand People have lost their Beast Rider (1 life) and 13 squaddies (2 lives) so have 3 dead, 4 living. The Moisture Farmers have lost the Sentry Gun (1 life) and 15 squaddies (3 lives), and Kyle Katarn, being a character on condition red, isn’t dead but counts against the total life count of the force, so have 4 dead, 1 living.

In forthcoming instalments:

🚩 The Moisture Farmers hire mercenary help and go after the Sand People
🚩 The Imperial garrison gets involved
🚩 The Sand People step it up and attack Mos Pattaya (it’s the Tet offensive).

Cheers from Mos Pattaya (not on the front line yet)

Mark


Friday, 23 October 2020

CoTGB: Smugglers vs Warbots


It was time to play Challengers of the Great Beyond again at the Southern Battlegamers club. I planned to run a force of warbots against a rag-tag smuggler type grouping run by Martin. The warbot force was using the sample list in the book, being;

Cyborg leader (Primordial Beast): 4 slots
Sentry gun: 3 slots
Robot sidekick: 1 slot
4 x light warbots (Cadets): 8 slots 

Martins smuggler crew were;

Psi-Knight leader: 4 slots
Bounty Hunter: 3 slots
2 x Starport Thugs: 6 slots
1 x Proud warriors: 2 slots
1 x burden: 1 slot

This is an image of the warbot force. Due to the great secrecy the smugglers carry out their operations in, I did not get an image of their starting line up.

We rolled for the complication and got "the macguffin redux". This is a tricky scenario, probably better suited to a more stealthy force like the smugglers. Both players put a clue token on their half of the board, and whenever a unit moves over a token, it is removed. From the 4th token removed, there is a chance it will be the "final" token that has the artifact that must be taken off the table. The trick is in the timing of uncovering the tokens - if you reveal all the ones on your half of the board, you give the game to the opponent, as they will be guaranteed to find the artifact on their half of the board and easily win the game.

The initial set up is as follows;


The yellow discs are the clue tokens. Of interest was a group of starport thugs finding a cozy home at a franchise outlet of Morebucks Slurpdregs franchise;


Anyway, the smugglers won the first initiative and the psi-knight leader using the leap psi skill leapt across the table from his position at the side of the morebucks building straight into a group of light warbots. The warbots used opportunity fire, inflicting 1 hit on the psi-knight, however, the melee was a fizzer - the psi knight must have been distracted by the flesh wound and completely missed.

In the following turn the warbots won the initiative and the cyborg leader, with its great movement ability, charged into the psi knight, the position shown below;


The fight was again quite defensive, with the psi knight parrying all attacks while failing to inflict anything back. As a side action, other warbots fired upon their foes, but missed as the starports thugs are quite evasive. Even the sentry gun failed after unleashing a volley upon the morebucks building.

In the next turn, where the smugglers won the initiative, the psi-knight pulled off a telling move. Using the "speed" power, giving the opportunity for two actions, he broke off from the fight and revealed the first token on the warbots side of the board. With the second action, he charged into another group of light warbots with a view to entering the building behind them.

Below is the result of the fight;


The left image shows the initial attack and the roll of the psi knight - with 6's counting as double hits for a plasma sword wielder, that came to 7 hits, a total wipeout as seen on the right. The warbots did attack first with 4 dice, but being mooks against a martial artist, they scored no hits in return.

The warbots has a lot of work to do. They won initiative in the next turn and opened fire again on the morebucks building, where the thugs had climbed to the roof to get the next clue token. The gun scored 3 hits. The cyborg also charged the psi knight in an attempt to end his reign of destruction - with the fight again being a stalemate and no wounds on either side. The smugglers, losing initiative, did a lot of manouvering, with the proud warriors moveing to position to attack a group of light warbots, and the bounty hunter being revealed next to a clue token. The position shown below;


The next turn was critical to the outcome of the game. The smugglers won initiative, and were able to reveal the rest of the clue tokens on their half of the board. With the 4th token revealed, this was a big gamble. They had to roll a 5 or 6 to have the 4th token being the artefact, on a failure, the warbots get into the box seat for victory as the artefact will be on their half of the table. As it was, the bounty hunter, on revealing the 4th token, rolled a 5. There were only two things that could stop the smugglers winning - the group of nearby light warbots, and if the cyborg could win and be freed from the fight with the psi knight.

The proud warriors charged, losing one figure to opportunity fire, but rolled well in the fight, wiping out the warbots with 6 hits, amazing rolling, as can be seen by the picture. Again the fight between the cyborg and psi knight resulted in a stalemate. The cyborg, being a "primordial beast" could not break away from the fight, so the psi-knight just had to keep it pinned in melee.

In the following turn, the victory dance of the proud warriors was short lived, as a unit of light warbots opened fire and wiped out 4 figures, leaving only 1 remaining.

However, it was all to late as there was no one to stop the bounty hunter exiting the board and running off with the artefact. The game was over by the 6th turn with a victory to the smugglers. In terms of casualties, the smugglers lost 5 proud warriors and 3 starport thugs (8 squad figures), while the warbots lost 12 cadet figures.

The smugglers force worked to its strengths, the psi knight was able to take a clue from the opponents side of the board to get a chance at their end of the board, and the bounty hunter was able to appear at an opportune location to get the 4th clue. The main hitting unit of the warbots, the cyborg, was able to be kept engaged by the psi-knight while the smuggle force was free to reveal clues. Though, had they failed to succeed on the 4th clue, the game could have turned out quite differently. So a near run thing in the end, a good game!


Monday, 6 July 2020

Challengers of the Great Beyond

A new skirmish game from Ganesha Games is Challengers of the Great Beyond (CotGB), intended for use with miniatures in a space opera style sci-fi world. This is a standalone game that is a progression of the fantasy Battlesworn rules written by Andrea Sfiligoi. As I wrote CotGB, I though it would be good to outline some of the differences with Battlesworn.

Battlesworn, which came out in 2013, is really a unique set of rules. It has a twist to most other sets of rules in that it uses a bidding system to determine initiative, as well as melee and shooting attacks. It also does not use measuring sticks - terrain instead dictates the extend of movement.

A traditional game will often determine how many units or figures you can activate with a random dice roll or multiple dice rolls. Here, you instead bid between 1 and 6 how many units you get to activate. If your bid is lower, that is how many you activate, if you bid higher, you activate the difference between both bids. There is a mechanism to deal with drawn bids. The lower bidder moves first and can attack, the higher bidder moves second, mainly reacting to the lower bidder or move around, they cannot initiate attacks. This provides a fair amount of agency, as you have to think of what you want to achieve this turn, and what your opponent wants to achieve, and try to get the bid right. It also gives the game at times a chess-like feel, where it can feel like you have out-witted your opponent with a good bid!

A difference between both rules is that in Battlesworn, you can bid any number between 1 and 6 throughout the game. In CotGB, standard playing cards are used instead, each player gets 12 cards, two 6's, two 5's, two 4's etc. Two cards are put aside as you play out 10 turn. Apart from helping with counting down the turns in the game, a big effect of the limited bid numbers is that you must plan the tempo; at what stage of the game you want to bid low? At what stage you want to bid high? It also reduces the number of drawn bids - for example, in the original Battlesworn, both players may be going for low bids of 1 or 2 towards the end of the game, and might continually bid the same number.

The mechanism for melee and shooting bids remain unchanged from the original Battlesworn. Here you instead use a six sided dice, place your bid face up on the table, but cover the dice with your hand or a lid. Both bids are then revealed at the same time. Unlike initiative, the higher bidder gets the full value of their bid (not the difference) - but the lower bidder goes first, so may defeat their opponent before they strike back.

Another difference between both sets is the introduction of squads. Battlesworn has the "rabble" concept, 1 life point models (rather than 4 life points) that were cheaper but acted as individuals. Squads in CoTGB are 4 or more models of 1 life point each that stay together. However, unlike rabble they do not act as individuals, the whole squad instead acts as if 1 figure. This was an important thing I wanted to represent in the game - large numbers of "mooks" that blaze away at heroic characters but are not as effective (important for Space Opera!). This also increases the figure count from Battlesworn where you generally had up to 12 figures, in CotGB, you can get up to 30+ figures a side. With the extra figure count, the rules have also been modified as to how line of sight and cover work.


The classes are also quite different to that in Battlesworn. They are probably closer in feel to those in Knights and Knaves, where each class has a number of abilities rather than just one. This also means that there is no multiclassing, but enough variety is represented so that you can run most figures available. Some abilities are similar to Battlesworn, most are completely new.


Psionics in CotGB is similar in effect to a lot of the magic powers in Battlesworn. A change here, however, is that they operate independently to the action point system - instead, psi users draw on a pool of psi points that reduces each time a power is used. This helps give psionics a powerful impact in the game, as they can be used in addition to the initiative bid, and allows characters to combine them with an action to pull off heroic feats.

Overall, CotGB was born out of a desire to bring Battlesworn into sci-fi. I had played the game with various futuristic mini's and thought that with a few tweaks, it would work well in a shooting heavy, high tech environment. The few tweaks became many as the game developed. Some key philosophies were that despite the shooting, in space opera fashion, hand to hand fights would remain a decisive way to win. Powerful characters should also be able to survive against gauntlet a expendable squads. This also flows through to the victory system where 5 squad figures are equal to most single characters - so beating up on squads will not give victory in many cases, you still have to take down the enemy characters.

I hope that those who play this game get as much enjoyment from it as I do!

For some more reports and resources on Battlesworn and CotGB, there is some excellent information at the Stronghold Rebuilt.


Tuesday, 28 April 2020

Arena Games Campaign

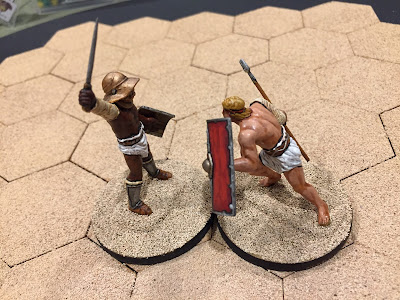
In my last blog post, I statted up a group of 54mm gladiators for playing Munera Sine Missione and Arena Games. I thought I would play out the suggested campaign at the back of the Arena Games rules. The campaign takes the form of a knockout competition, so that 7 games are needed to play with 8 figures - round one the 8 gladiators fight in pairs over 4 games. Tis then halves as the winners paly each other in pairs in two games, then there is the final fight.

One challenge was that I was doing this solo, and there is a dice allocation mechanic in the rules which involves a bit of bluffing and setting up a future move. I decided initially on using a dice roll to work out how the points were allocated, but his gave some strange results. Eventually I just used judgement on how to allocate the points.

I am using 54mm gladiators that I covered in my last post 54mm Gladiators. The initial draw looks like this;


Fight 1: Flamma (Myrmillo) vs Proculus (Thracian)
These two evenly matched gladiators traded blow for blow until Flamma took too many hits to the legs and was reduced to a one hex move. Proculus could not finish it off and ended up losing his shield. This was down to the wire with both gladiators down to 4 or 3 attack dice from 6. The critical time came in the 6th turn where Flamma won initiative and had Proculus against a wall, and then getting the critical body blow, so it did not go to appealoculus. For his efforts, Proculus gained a +1 to inititaive skill. Here is the final position:


Fight 2: Piscator (Retiarius) vs Ferox (Contra-Retiarius)
This fight started with a successful net toss by Piscator, who was able to inflict 4 wounds before Ferox broke free. Piscator tried some fancy manoeuvring rather than trying to retrieve his net which backfired when Ferox got some solid leg hits reducing Piscator to a one hex move. With the movement advantage gone, and the net too far away to retrieve, Ferox closed out the fight in the 3rd turn with an attack to the head, which was another mortal wound. The main lesson was for the Retiarius to always retrieve the net...Ferox gained a popularity skill. Here is the final position:


Fight 3: Memnon (Myrmillo) vs Brennus (Velite)
This was going to be interesting, as in some test games earlier, Brennus was very hard to beat. Brennus was a lot more successful in his attacks, doing 7 hits on Memnon, but they were all scattered. Brennus only too 4 hits, but 3 were to the head meaning....another mortal wound in game terms. A win to Memnon, who also gained a popularity skill. I'm not sure that skill is too useful, however, as none of the fights have gone to crowd appeal yet. Here is the final position:


Fight 4: Diodorus (Dimachaerus) vs Clitus (Hoplomachus)
Clitus had better armour, but Diodorus was faster with a good double sword attack. Diodorus was finding it difficult to break through the armour after 2 turns of trying. So he gambled on getting rear attacks by trying to finish the turn at the back of Clitus, hoping to win initiative. Clitus won initiative on the 3rd turn and made Diodurus pay. Diodorus tries again, but again lost initiative, eventually losing on the 4th turn with another mortal wound to the head. Clitus only took one wound in the whole fight, which sent an ominous message. He also gained the +1 initiative skill, which seemed appropriate. Here is the final position:


The position after the first "round 1" fights;


Qualifying Fight 5: Ferox (Contra-Retiarius) vs Flamma (Myrmillo)
Flamma started with a strong attack that only caused one wound to the heavily armoured Ferox. Then Ferox countered with a quick 3 wounds to Flamma, who was now reduced to 5 attack dice. It seemed that Flamma was now doomed. Flamma tried the (failed) Diodorus tactic of ending the turn at the rear and attempt to win initiative. Flamma pulled it off and was able really damage and wear down Ferox. Unlike previous fights, the wounds were fairly scattered so Ferox was tkane down to zero stamina by the 4th turn - the +1 initiative skill to Flamma worked. It went to appeal. Being the 4th turn, Ferox needed a 6 on a D10 to survive, but had the popularity skill giving a +1. He rolled a 5, so that skill worked 2. The first time the loser has survived a fight. Flamma gained the initiative skill.

Qualifying Fight 6: Memnon (Myrmillo) vs Clitus (Hoplomachus)
It looked like Clitus had the edge in this fight, better armour, the same initiative, and a long reach spear. Memon had to start fast, which he did, scoring 2 hits on Clitus. However, Clitus got probably the best combat rolls of the tournament so far, inflicting 6 wounds on Memon, 5 on 1 leg, so reducing Memnon to a 1 hex move. Against a gladiator that has a 2 hex attack range with the spear, this become mission impossible. Memnon could have thrown his sword, but that was a low percentage play against a relatively healthy Clitus. Memon was worn down to below zero stamina, ending the fight. Clitus gained the popularity skill (though there has only been 1 appeal in 6 fights....), not sure why these gladiators want the crowd. Here is the final position:


Here is the position leading up to the final fight:
Final: Flamma (Myrmillo) vs Clitus (Hoplomachus)
The final fight. Of the 2, Clitus had been the more convincing so far. This was to prove an epically dour fight, as neither gladiator wanted to take too much risk. The first breakthrough came when Clitus took enough hits to lose his shield. This turned the fight to Flamma's favour. The critical point came where Flamma skirted with the Arena wall to get a rear attack, and Clitus won initiative and tried to rein a flurry of blows upon Flamma, but the attack failed. Clitus was taken to zero Stamina by the 7th turn, the longest fight so far. It went to appeal - on the 7th turn, a roll 4+ was needed, and Clitus had +1 for popularity. He rolled a 2..... Here is the final position:


This was quite a deadly campaign, only two gladiators from eight survived. A lot happens in each turn, and though the games last a maximum of 10 turns, the average length was 4 turns. The games did provide a lot of action and there was plenty of movement.